

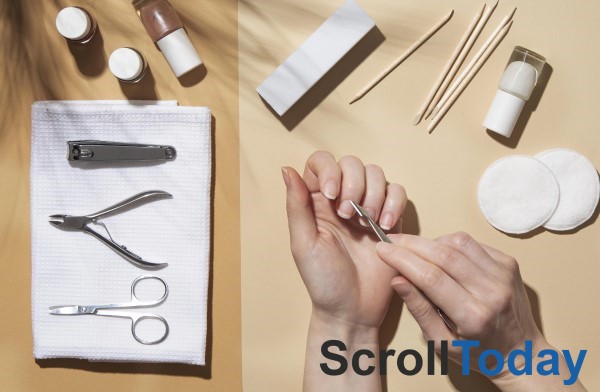
Good nails start with good tools of nail, not luck. Whether you’re trimming a hangnail before a meeting or building intricate nail art at home, the right equipment makes the difference between a clean finish and a botched one. This guide walks through every category of tools of nail you’ll ever need, how to use them properly, and how to keep them working (and hygienic) for years.
Most people own a nail clipper and little else, then wonder why their manicure never looks quite professional. The truth is that nail care is a small toolkit problem, not a skill problem. Once you understand what each tool does and when to reach for it, the results follow naturally.
Why Having the Right Tools of Nail Matters
Nails are made of layered keratin, and each layer behaves differently under pressure, moisture, and cutting angle. Using the wrong implement a blunt clipper, a rough emery board on wet nails, or a metal cuticle pusher pressed too hard causes splitting, snagging, and cuticle damage that takes weeks to grow out.
A proper set of tools of nails does three things well:
- Shapes and smooths the nail edge without weakening it
- Manages the cuticle and surrounding skin safely
- Prepares the surface for polish, gel, or nail art to actually last
Salons charge for this expertise, but with a modest home kit and a bit of technique, you can match most of that quality yourself.
Core Nail Care Tools Everyone Should Own
Clippers and Nippers
A nail clipper is the workhorse of any kit. Look for stainless steel with a sharp, tight-closing blade cheap clippers crush rather than cut, which causes splitting.
- Standard clippers: best for fingernails and everyday trimming
- Toenail clippers: wider, straighter jaw for thicker nails
- Cuticle nippers: small, curved blades for trimming excess cuticle skin, not cutting the nail itself
Nail Files and Buffers
Filing shapes the nail after clipping and smooths any rough edges left behind.
- Glass or crystal files: gentle, long-lasting, and less likely to cause splitting than emery boards
- Emery boards: cheap and disposable, best for quick touch-ups
- Buffer blocks: smooth ridges and add shine without needing polish
Always file in one direction. Sawing back and forth is one of the most common causes of weak, peeling nails.
Cuticle Tools
The cuticle protects the nail matrix from infection, so cuticle tools need a light touch.
- Cuticle pusher (metal or rubber-tipped wood/orange stick): gently pushes back softened cuticle after soaking
- Cuticle oil and a soft brush applicator: keeps the skin around the nail hydrated and less prone to hangnails
- Cuticle nippers: only for trimming loose, dead skin never the living cuticle
Nail Brushes
A stiff-bristled nail brush is the most overlooked tool of nail hygiene. It’s designed specifically to answer one common question people search for: how to get dirt out from under nails without damaging them.
Tools to Get Dirt Out of Nails
Dirt, grime, and product residue collect under the free edge of the nail, and scraping with a metal file or pin often scratches the nail bed. Here’s a safer sequence:
- Soak hands in warm water with a drop of mild soap for two to three minutes to soften trapped debris
- Brush gently under each nail with a soft-to-medium nail brush, working in small circles
- Use an orange stick with a rounded, flat tip to lift out any remaining dirt from the underside of the nail
- Rinse and dry thoroughly, then apply cuticle oil to replace any moisture lost during soaking
Avoid metal picks, safety pins, or anything with a sharp point for this task. They can lift the nail from the nail bed and create an entry point for bacteria a real risk, not just a cosmetic one.
Tools of Nail Art: Building a Creative Kit
Nail art has its own specialist toolkit, separate from basic care. If you’re moving from plain polish into designs, these are the tools of nail art worth having on hand.
Brushes and Dotting Tools
- Detail liner brush: thin, tapered bristles for fine lines and outlines
- Fan brush: for gradient and ombré effects
- Dotting tools: metal-tipped rods in graduated sizes for perfect dots, flowers, and polka-dot designs
Stamping Equipment
Nail stamping has become popular precisely because it removes the need for a steady hand.
- Stamping plate: etched metal plate holding a design
- Stamper: a silicone-headed tool that picks up the design and transfers it to the nail
- Scraper: removes excess polish from the plate before stamping
Extension and Shaping Tools
- Nail forms: adhesive guides for building sculpted extensions
- Buffer and coarse file: shapes acrylic or gel extensions before finishing
- Cuticle pusher with a flat edge: doubles as a clean-up tool around gel and acrylic edges
Finishing and Precision Tools
- Fine-tipped tweezers: for placing gems, foils, and small decals
- Cleanup brush with acetone: tidies polish that strays onto the skin
- UV or LED lamp: essential if you’re working with gel polish or gel-based nail art
Comparison: Basic Kit vs Nail Art Kit
| Tool Category | Basic Care Kit | Nail Art Kit |
|---|---|---|
| Cutting | Clippers, cuticle nippers | Rarely needed once nails are shaped |
| Shaping | File, buffer block | File, buffer, nail forms |
| Cuticle care | Pusher, oil | Pusher (also used for clean-up) |
| Hygiene | Nail brush, orange stick | Cleanup brush with acetone |
| Design | Not applicable | Dotting tools, liner brush, stamping plates, tweezers |
| Finishing | Top coat | UV/LED lamp, top coat, sealant |
How to Keep Your Nail Tools Clean and Safe
Nail tools touch skin, cuticle, and sometimes broken skin around hangnails, so hygiene isn’t optional.
- Wash metal tools with warm soapy water after every use
- Disinfect clippers and nippers with isopropyl alcohol (70% or higher) and let them air dry
- Replace emery boards and buffer blocks every few months they can’t be fully sanitised once worn
- Store tools in a closed case, not loose in a drawer, to avoid dulling the blades
Skipping disinfection is one of the main reasons people develop nail infections after DIY manicures, so this step matters more than most people assume.
Frequently Asked Questions
What are the basic tools of nail care? A clipper, file, cuticle pusher, cuticle nippers, and a nail brush cover almost every routine need. Add cuticle oil for maintenance between manicures.
How often should I replace my nail tools? Metal tools like clippers and pushers can last years if cleaned properly. Disposable items like emery boards and buffer blocks should be replaced every two to three months, or sooner if bristles or grit wear down.
What’s the best tool to get dirt out of nails without hurting them? A soft nail brush combined with a rounded orange stick is the safest combination. Sharp metal picks risk lifting the nail or scratching the nail bed.
Do I need special tools for nail art, or can I use basic ones? Basic tools handle shaping and prep, but genuine nail art dots, lines, stamping, gems needs dedicated tools like dotting rods, a liner brush, and a stamper. Trying to freehand fine detail with a regular brush rarely gives clean results.
Can I use household items instead of proper nail tools? Toothpicks and sewing needles are sometimes used in a pinch, but they lack the rounded, safe edges designed for nail work and carry a higher risk of injury or infection. A proper toolkit is inexpensive enough that substitutes aren’t worth the risk.
Final Thoughts
Building a reliable set of tools of nail doesn’t need to be expensive or complicated. Start with the basics clippers, a file, a cuticle pusher, and a nail brush then expand into dotting tools, stampers, and liner brushes once you’re comfortable with simple shaping and cleanup. Keep everything clean, replace disposable items regularly, and your nails (and your nail art) will look noticeably better within a few sessions.
If you’re just getting started, invest in one quality tool at a time rather than buying a large kit of tools of nails you may not use. A sharp clipper and a good glass file will do more for your nails than a drawer full of unused gadgets ever will.
